Mastering Mark Rubber: Tips For Removing & Making Lasting Impressions
Have you ever found yourself staring at an annoying scuff mark on your floor, or maybe a tire mark on your driveway, wondering how on earth to get rid of it? Perhaps, on the flip side, you've needed to label something made of rubber, like a garden hose or a piece of equipment, and just couldn't find a pen that would stick. These everyday situations, where we either want to erase a mark made by rubber or put a lasting mark on rubber, are what we mean when we talk about "mark rubber." It’s a common challenge for many people, really.
Dealing with marks on or from rubber can feel a bit tricky, since the material itself has unique properties. Different surfaces react in different ways to rubber scuffs, and getting a permanent mark on rubber often requires a special approach. You might be surprised, too, by how many different items in your home or workshop involve rubber, making these issues quite widespread.
This article will walk you through some practical ways to handle those frustrating rubber marks and, just as important, show you how to make your own clear, lasting marks on rubber items. We'll share some simple methods and good tools to help you keep things looking tidy or neatly organized. So, let's get into it, actually.
Table of Contents
- Understanding "Mark Rubber": What It Means for You
- Why Rubber Leaves Its Mark: A Look at the Causes
- Removing Unwanted Rubber Marks: Your Go-To Guide
- Making Your Mark: Permanently Marking Rubber Items
- Preventing Future Rubber Marks: Smart Steps
- Frequently Asked Questions About "Mark Rubber"
Understanding "Mark Rubber": What It Means for You
The phrase "mark rubber" can, in a way, point to a couple of different situations we often face. It might mean a mark that rubber itself leaves behind, like a dark line on a kitchen floor. Or, it could mean the act of putting a lasting mark onto a rubber item, maybe to label it or add some kind of design. Both of these situations, you know, come with their own set of questions and ways to solve them.
The Challenge of Rubber Scuffs and Stains
Almost everyone has, at some point, seen those dark, stubborn lines left by shoe soles on a shiny floor. These are, in fact, classic examples of rubber marks. They can show up on various surfaces, from wooden floors to painted walls, and they often seem quite hard to remove. This type of mark, usually from friction, means a little bit of the rubber material gets transferred onto another surface. It's a common issue, especially in busy homes or public places, and people often look for simple ways to clean them up.
The Need to Label or Identify Rubber Items
Then there is the other side of "mark rubber": needing to put a mark *on* something made of rubber. Think about garden hoses, rubber boots, tools with rubber handles, or even tires. Sometimes you want to label these things for ownership, for organization, or just to personalize them. Finding something that will write on rubber and actually stay put, without smudging or fading quickly, can be a real head-scratcher. Regular pens just do not do the job, as a matter of fact.
Why Rubber Leaves Its Mark: A Look at the Causes
Understanding why rubber makes marks helps us figure out how to deal with them, you see. It's not magic; it's mostly about how materials interact. There are a couple of main reasons these marks appear, whether they are scuffs or stains.
Friction and Material Transfer
The most common reason for rubber marks is friction. When a rubber item, like a shoe sole or a car tire, rubs quickly against a surface, tiny bits of the rubber actually rub off. These small particles then stick to the other surface, leaving a dark streak. This happens a lot on hard, smooth floors, where the contrast is very clear. The heat generated from the rubbing can also make the rubber particles stick even better, which is why they can be so stubborn.
Chemical Reactions and Discoloration
Sometimes, rubber can leave a mark that is not just a scuff, but more of a stain or discoloration. This happens when chemicals in the rubber react with the chemicals in the surface it's touching. For example, some rubber products contain antioxidants that can migrate out and cause yellowing or browning on light-colored materials. This kind of mark is often harder to remove because it's a chemical change, not just a surface deposit. This is a bit more complex, really.
Removing Unwanted Rubber Marks: Your Go-To Guide
Getting rid of those annoying rubber marks does not have to be a big chore. With the right approach and a few common household items, you can often make them disappear. The trick is knowing what works best for different surfaces, since what cleans a floor might not be good for a car interior, you know.
Getting Rid of Scuffs from Hard Floors
Hard floors, like wood, laminate, or tile, are often victims of rubber shoe scuffs. Luckily, these are usually surface marks and can be dealt with quite easily.
- **Pencil Eraser:** For light scuffs, a simple pencil eraser can do wonders. Just rub the eraser over the mark, and it should lift right off. This is very gentle, actually.
- **Tennis Ball:** A clean tennis ball, believe it or not, works great for bigger scuffs. Press the ball firmly onto the mark and twist it back and forth. The slight abrasion from the felt helps to buff the mark away.
- **Baking Soda Paste:** For more stubborn marks, mix a little baking soda with a few drops of water to form a paste. Apply it to the mark, gently scrub with a soft cloth or sponge, then wipe clean. This method is a bit more abrasive, so be careful on very delicate finishes.
- **Rubbing Alcohol:** A cotton ball dampened with rubbing alcohol can also dissolve many rubber marks. Test it first in a hidden spot to make sure it does not harm your floor's finish.
Cleaning Rubber Marks from Walls and Painted Surfaces
Walls, especially those painted with lighter colors, can easily pick up rubber scuffs from furniture or playful kids.
- **Magic Eraser (Melamine Foam):** These sponges are really good for wall scuffs. Just dampen one with water and gently rub the mark. It acts like a very fine sandpaper, so use a light touch to avoid removing paint.
- **Toothpaste:** Non-gel white toothpaste can also work. Put a small amount on a soft cloth and gently rub the mark in a circular motion. Wipe with a damp cloth afterward. This is a pretty common household trick.
- **Dish Soap and Water:** For lighter marks, a simple solution of warm water and a little dish soap can sometimes do the trick. Wipe with a clean, damp cloth.
Tackling Tire Marks on Driveways and Concrete
Tire marks on concrete driveways can be a real eyesore, and they are, you know, often tougher than shoe scuffs.
- **Heavy-Duty Degreaser:** A good quality concrete degreaser is often the best bet. Apply it according to the product instructions, let it sit, then scrub with a stiff brush and rinse thoroughly with a hose or pressure washer.
- **Trisodium Phosphate (TSP):** For very stubborn marks, TSP is a powerful cleaner. Mix it with water as directed, apply, scrub, and rinse. Always wear gloves and eye protection when using TSP, as it is quite strong.
- **Wire Brush:** Sometimes, a wire brush can help to loosen the rubber from the concrete surface, especially when used with a cleaner. Just be careful not to damage the concrete itself.
Lifting Rubber Stains from Fabric and Clothing
Getting rubber marks on clothes or upholstery can be frustrating, but there are ways to try and remove them.
- **Rubbing Alcohol or Hairspray:** For fresh marks, dab a cotton ball soaked in rubbing alcohol or spray a little hairspray onto the mark. The alcohol helps to break down the rubber. Blot gently, do not rub, and then wash the item as usual.
- **Pre-Treatment Stain Remover:** Apply a laundry stain remover directly to the mark and let it sit for the recommended time before washing. This can be quite effective, too.
- **Scraping (for dried rubber):** If it's a piece of dried rubber stuck to fabric, you might be able to gently scrape off the excess with a dull knife or spoon before treating the stain underneath.
Erasing Marks from Car Interiors
Car interiors, especially plastic or vinyl surfaces, can get scuffed by rubber mats or shoes.
- **Interior Cleaner:** A dedicated car interior cleaner is usually safe and effective. Spray it onto a microfiber cloth and wipe the mark.
- **Mild All-Purpose Cleaner:** A diluted all-purpose cleaner can also work, but test it first in a hidden area to ensure it does not cause discoloration.
- **Magic Eraser (Melamine Foam):** Use with extreme caution and a very light touch on car interior plastics, as it can sometimes remove the finish if you rub too hard.
Making Your Mark: Permanently Marking Rubber Items
Sometimes, you want to put a mark *on* rubber that will last, whether it's for labeling tools, personalizing items, or just making something easier to find. Regular pens just do not cut it, as a matter of fact, since rubber's surface is often non-porous and flexible.
Choosing the Right Tools for Marking Rubber
The key to marking rubber is picking a tool with ink that can adhere to its unique surface and withstand some wear.
- **Permanent Markers (Oil-Based):** Oil-based paint markers are usually the top choice. Their ink is opaque, vibrant, and adheres well to non-porous surfaces like rubber. They are also quite water-resistant and fade-resistant.
- **Industrial Markers:** Some industrial-grade markers are specifically made for tough surfaces, including rubber. These often have very durable ink.
- **Rubber Stamps with Specialty Ink:** If you need to make the same mark many times, a rubber stamp with a fast-drying, permanent, solvent-based ink designed for non-porous surfaces can be a good option.
- **Engraving Tools:** For a truly permanent mark, especially on thicker rubber, a rotary tool with an engraving bit can carve a mark directly into the material. This is, you know, a bit more involved.
Preparing the Rubber Surface for Marking
A clean surface always helps the mark stick better.
- **Clean Thoroughly:** Wipe the rubber item with rubbing alcohol or a mild degreaser to remove any dirt, oil, or mold release agents. Let it dry completely.
- **Lightly Roughen (Optional):** For some very smooth or slick rubber, a very light sanding with fine-grit sandpaper can create a slightly textured surface for the ink to grab onto. Be careful not to damage the rubber.
Applying Your Mark for Lasting Results
Once your surface is ready and you have your marker, here are some tips for applying the mark.
- **Shake the Marker:** If using an oil-based paint marker, shake it well to mix the paint.
- **Prime the Nib:** Press the marker nib down on a scrap piece of paper until the ink flows.
- **Apply Evenly:** Write or draw on the rubber surface with steady, even strokes. Try to avoid going over the same spot too many times, as this can sometimes lift the previous layer of ink.
- **Allow to Dry:** Give the ink plenty of time to dry completely. This might take several minutes to an hour, depending on the marker and the thickness of the application. Some inks might need a full 24 hours to cure for maximum durability.
- **Consider a Clear Coat (Optional):** For extra protection against wear and tear, you might apply a clear, flexible sealant or varnish over the dried mark. This is especially good for items that will see a lot of handling or outdoor exposure.
Ideas for Marking Different Rubber Items
Think about all the places you could use these marking skills.
- **Garden Hoses:** Label them for different uses or to identify whose is whose.
- **Rubber Boots or Galoshes:** Personalize them or mark sizes.
- **Tools with Rubber Grips:** Add your name or a code to prevent mix-ups.
- **Sporting Equipment:** Mark basketballs, footballs, or other gear.
- **Tires:** Mark them for rotation, especially if you store them seasonally.
- **Gaskets or Seals:** Label them with their size or type for easier identification during repairs.
Preventing Future Rubber Marks: Smart Steps
The best way to deal with rubber marks is, quite frankly, to stop them from happening in the first place. A little thought can save you a lot of cleaning time.
- **Use Floor Protectors:** Place felt pads or rubber-safe glides under furniture legs to prevent scuffs on floors.
- **Choose Non-Marking Soles:** When buying shoes, look for those with non-marking rubber soles, especially for indoor use.
- **Regular Cleaning:** Keep floors and surfaces clean to reduce friction and the likelihood of marks.
- **Mind Your Movement:** Be mindful of how you move heavy items or equipment with rubber wheels to avoid dragging them across sensitive surfaces.
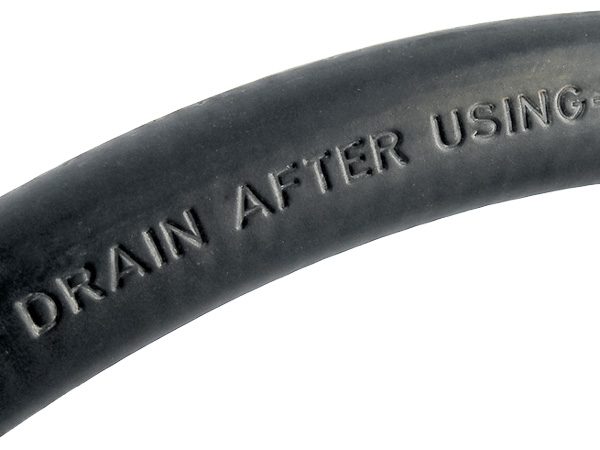
Tire and Rubber Marking Systems

Mark Rubber Ink Personal Stamps Big Automatic Self Inking Rubber Stamps
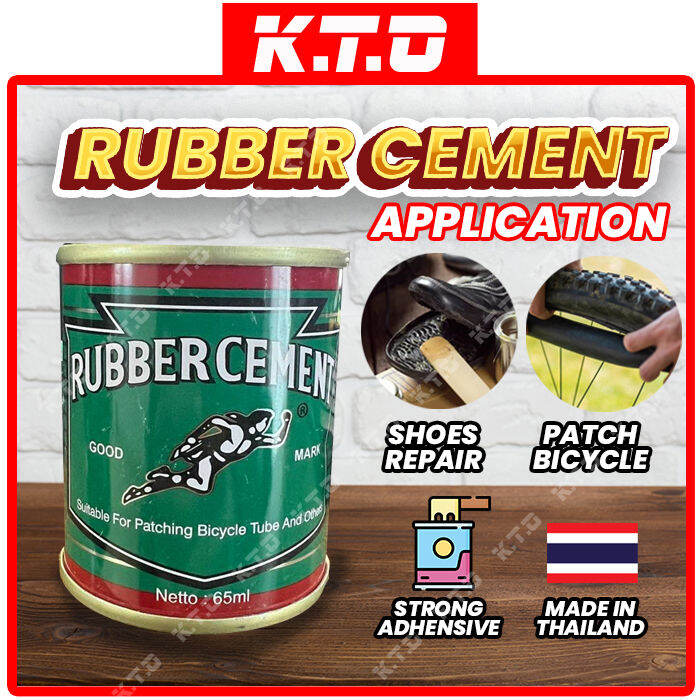
65ml Good Mark Rubber Cement Adhensive Glue for Patching Tube / Gam
